A DSLR or CSC camera will give you much more control over how your finished images will look. Some high-end compacts will also offer some control, but a DSLR or CSC will give you a far greater creative control. Bear this in mind when buying a camera – think about your future needs.
Modes are normally changed by turning a dial on the top plate of the camera. Here is a dial on one of my cameras, yours may differ slightly but the basics will remain the same.

What are the modes?
Auto or iAuto:
In this mode the camera takes full control of how the image will look. This is good if you are new to photography as it will help to get you going. This setting takes away all the technical aspects, letting you concentrate solely on your subject.
Program:
This mode is like that of Auto mode, but here you have the ability to set the exposure compensation, which enables you to lighten or darken the image in tricky lighting conditions. The ISO level you have chosen remains constant unless you decide to alter it. This helps to give you consistent quality images, whilst still giving you some control over your image.
Aperture Priority:
This is where you control the amount you have in focus, which is your depth of field. You can use a shallow depth of field (something like f1.8) making your subject stand out from the background which is ideal for portraits, flora, and fauna.

If you were to choose a smaller aperture your depth of field would be greater (f11) which would be ideal for landscapes or seascapes, which is where you would want as much as possible in focus. If you wish to lighten or darken your image you would use your exposure compensation to do this.

Shutter Priority:
You would use this mode when you want to show some movement in your image. If you were at the racetrack and wanted to show a race car, or bike going quickly, you would choose a slow shutter speed, maybe even as slow as 1/30sec and pan the car (following the car, or bike with your camera).
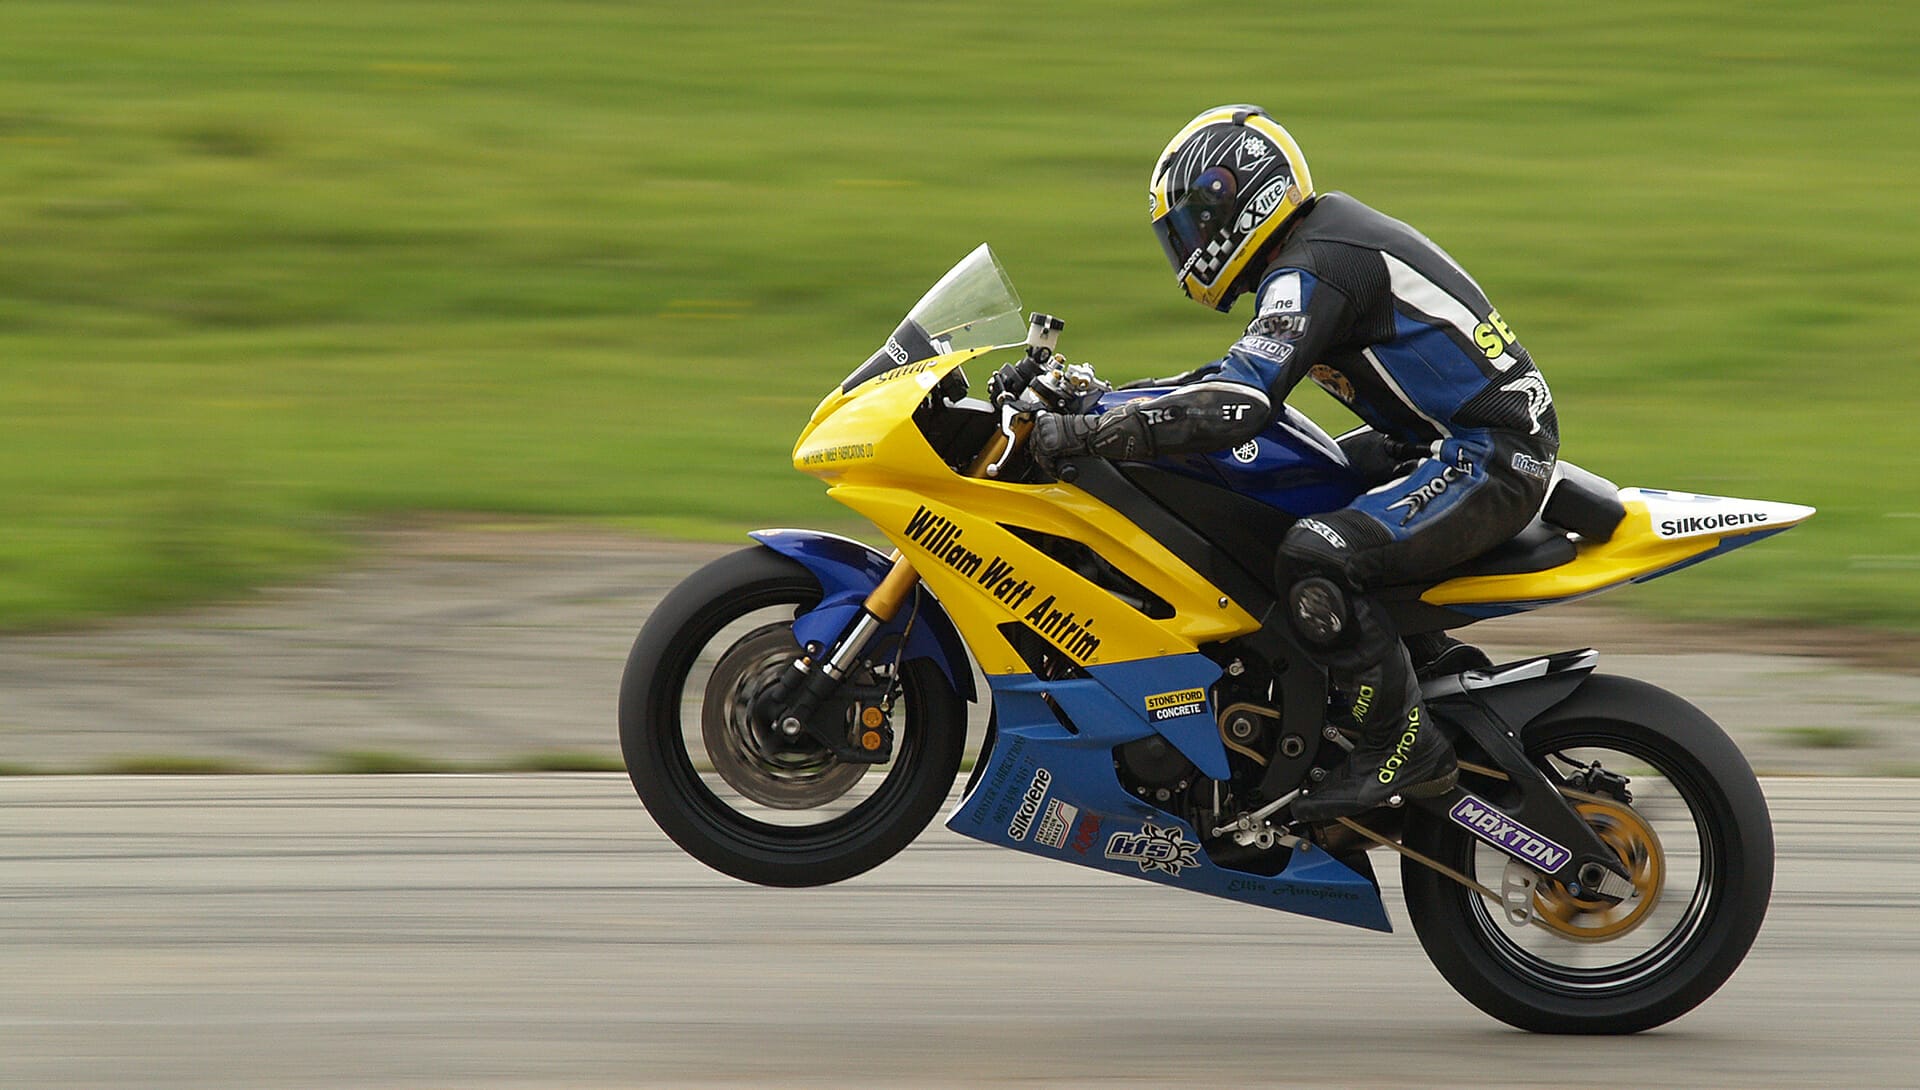
This would then make your car sharp whilst the background would be blurred. If I chose a fast shutter speed say 1/500sec the whole image would appear sharp, making the car look as if it had stopped with no sensation of speed.
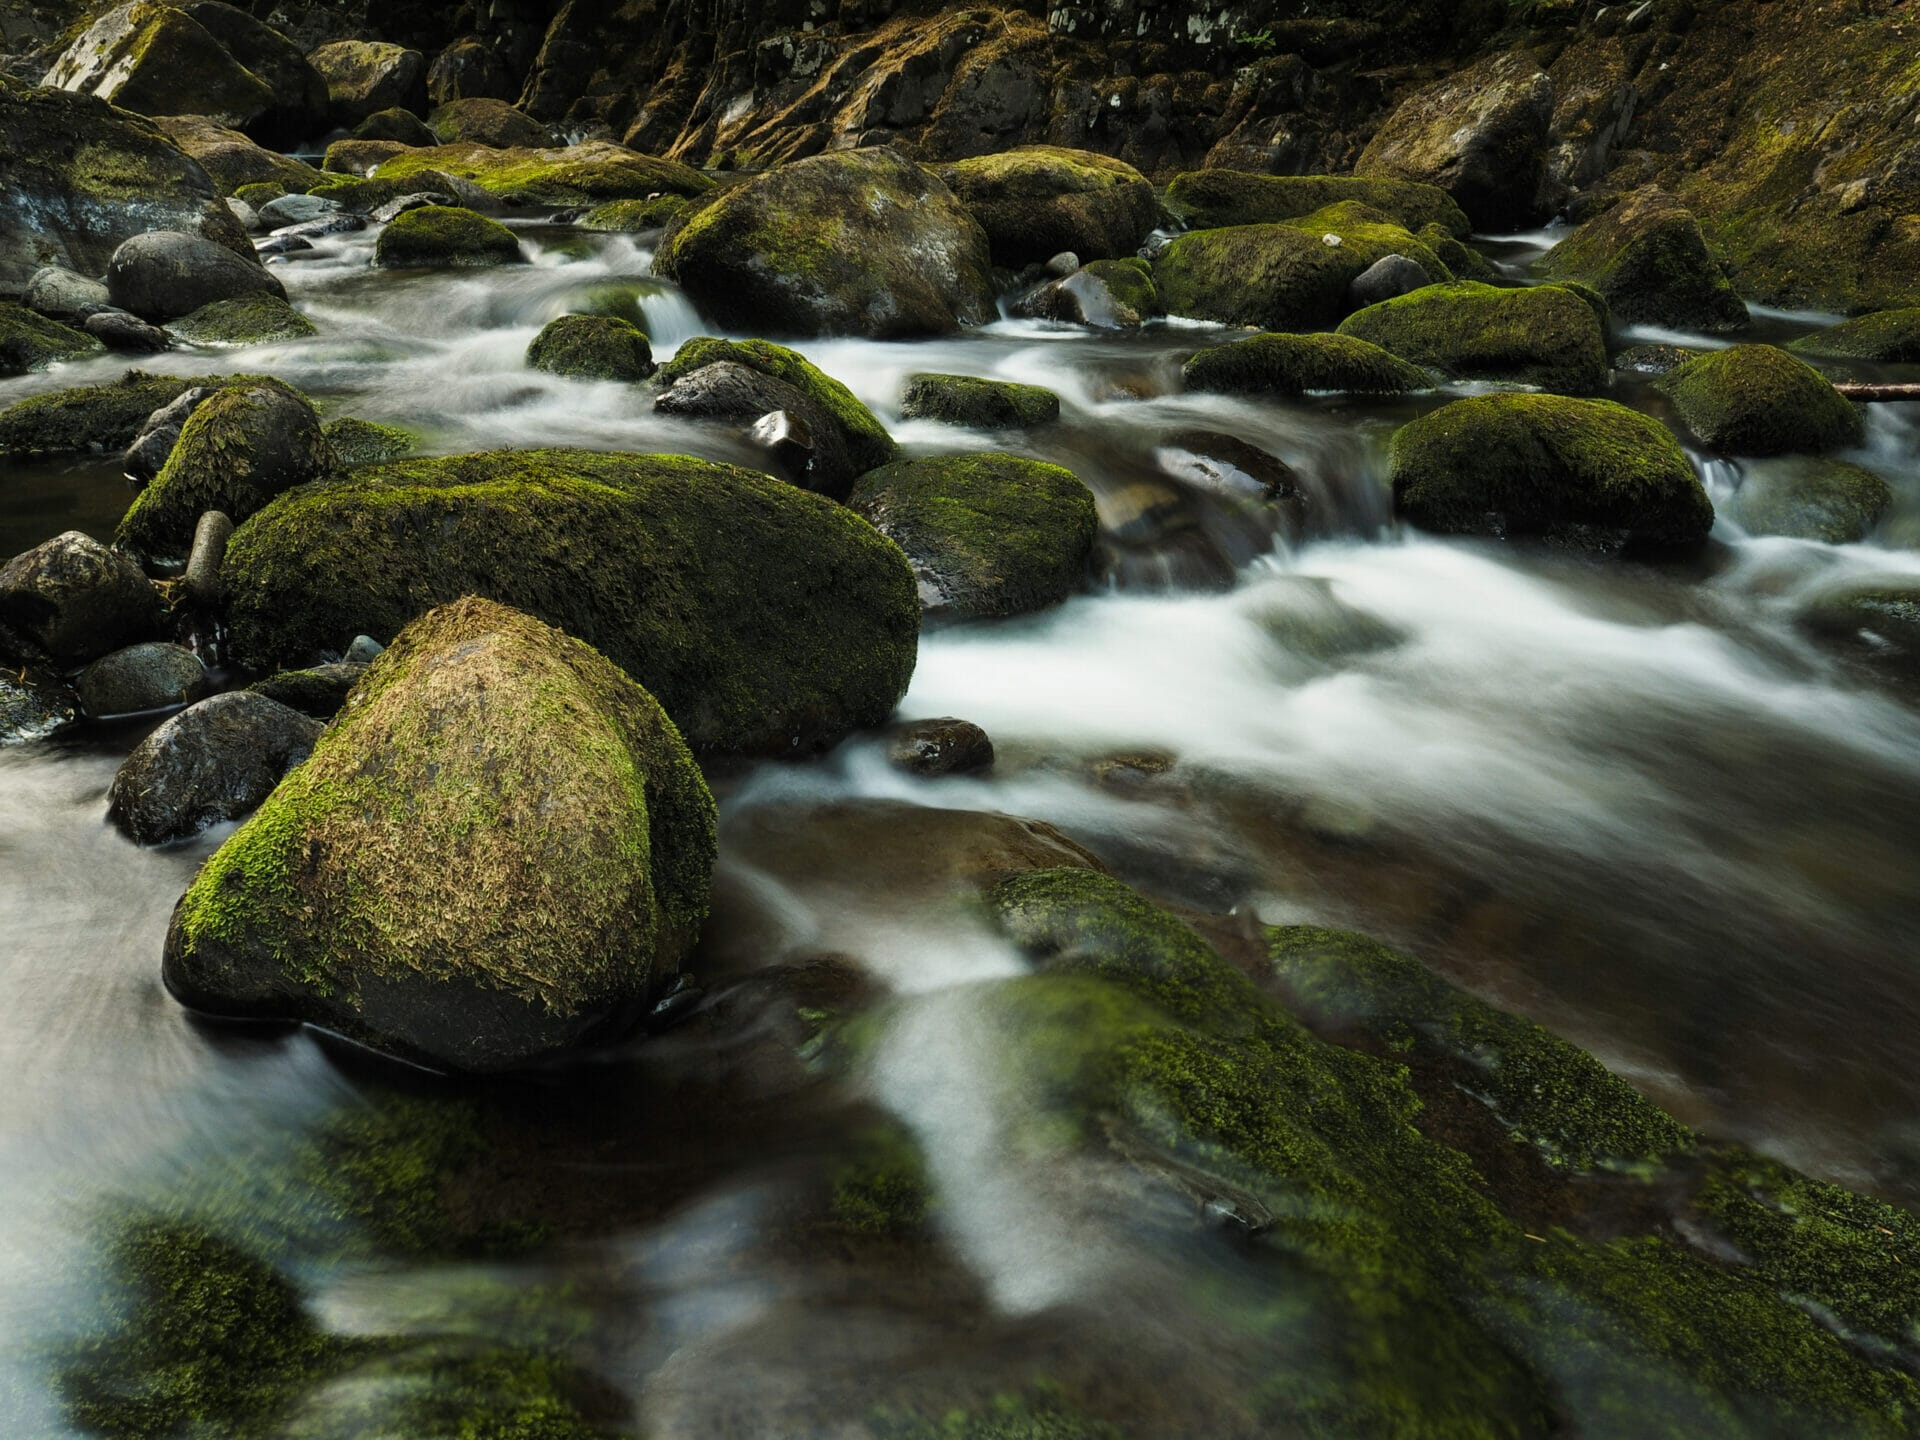
If you shoot waterfalls or seascapes with slow shutter speeds the water will come out smooth and silky, these speeds could be anything from around 1 second to minutes or even longer depending on the effect you want.
Slow shutter speed
Fast shutter speed
If you choose a fast shutter speed the water will appear frozen, often stopping all the droplets in mid-air.
Exposure compensation can once again be used to override the camera meters setting if required.
Full Manual:
Shooting in full manual gives you control over all the cameras settings. Here you can be your most creative, working around the suggested cameras meter settings. Manual mode is very handy when you need consistency in your exposures as the settings will remain the same unless YOU change them.
Unlike in the other camera modes, where the settings can change automatically according to lighting fluctuations, this will not happen while shooting in manual mode.

Scene Modes:
These are on most mode dials. This mode will either have an icon or just the letters SCN. Icons range from a flower for a close-up mode, face for portraits, and a mountain for a landscape.
These are pre-set modes which are designed to give you what the camera thinks are the correct settings for your chosen subject.
If you chose the portrait mode it would choose a wide aperture making for a blurred background, or if you chose the sport mode it would choose a fast shutter speed, great for freezing movement but these settings do not always give you the results you may want.
Scene mode settings can be useful if you are a newcomer to photography, but they do not allow much room for creativity.
Now you know what they do, when and how do you choose the correct one to use?
This are how I like to work.
Auto:
Good setting to use if you are very new to photography. This enables you to capture images with your new camera without having to worry about too many settings. But I would recommend that you move away from this as soon as you feel confident. Both you and your camera can let you be much more creative.
Programme:
A step up from the auto setting. This is one I sometimes use if I need to grab a shot quickly. All I need to do is turn the dial to the ‘P’ setting frame up and press the shutter.
Aperture Priority:
My favourite mode for static subjects. This is the mode which I use for around 80% of my photography along with many other photographers.
Shutter Priority:
This is the setting I use when I need to show movement in my images. Anything from a waterfall to a racing car.
Manual:
This mode is the one I would always use if using studio lighting or flash, or any situation where I would need to control my aperture, shutter speed and ISO individually.
You may hear it said that all expert photographers always shoot in manual mode. This is untrue. I know many Professional photographers who use all the modes at some time or another, just as I do. Manual mode can take a little longer to set up than aperture priority so you could miss a shot – I’d rather shoot in another mode and not miss the shot if it meant having to set my camera for the conditions.
I hope you have found this information useful and that it helps you get the best from your camera – Let me know in the comments below how you get on.
Eifion


Leave a comment